
Cameras for Feeding Station Photos
To follow up on last week’s introduction to photographing in your yard, and more specifically photographing at your feeding station, we wanted to share some ideas about how you can get a solid start at expanding your backyard birding activities to include a camera in hand and digital photos in your near future. Truly, this can be the most advanced and most rewarding aspect of backyard birding, so we are hoping folks without current bird photo equipment will consider some fairly easy to use, economy-minded equipment to get started in advance of all the excitement that fall migration brings.
If you already have photo equipment that includes a close-range or medium-range zoom lens, you’re in business. (Smart phones are not adequate for bird photography.) For birders looking for an entry-level bird photography option to get started, that’s easy, and it’s not very expensive. As with anything, digital – your computer, smart phone, or iPad – there’s an initial investment, but photography can truly add a new dimension to your life, so what’s that worth?
A Helpful Camera and Lens Suggestion
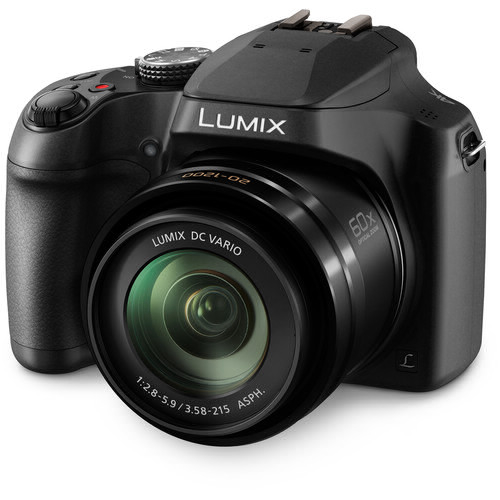
A top choice among the point-and-shoot digital options, partly for its affordability ($400), partly for its quality of photos (18 meg sensor), partly for its considerable zoom capabilities, and partly because of its full-sized body that makes it easier to handle, the Panasonic Lumix DC-FZ80 Digital Camera is a great starting point as you shop for a camera with a built-in zoom lens. You can learn more about it at Panasonic Lumix DC-FZ80 Digital Camera DC-FZ80K B&H Photo Video (bhphotovideo.com)
For other options, including Canon, Nikon, Olympus, Sony, and other camera makes and models, we suggest shopping the options at B&H Photo because they have an impressive selection and usually the best price. It’s also a good starting point if you are ready to jump into the DSLR camera or mirrorless camera and lens realms. Another option is to find a slightly used camera that meets your interests, which can bring the sticker price down too.
If possible, swing by a local store to get a feel for some options they may have on hand – new or used. When you have a camera in hand, give it a quick workout, zooming in and out, focusing on this and that, and frankly, that’s about all the practice you need. After that, it’s a matter of taking some photos.
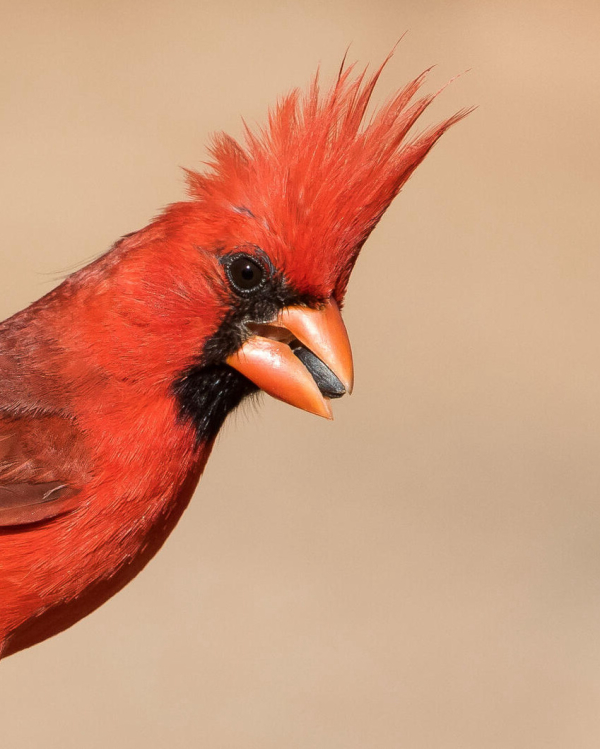
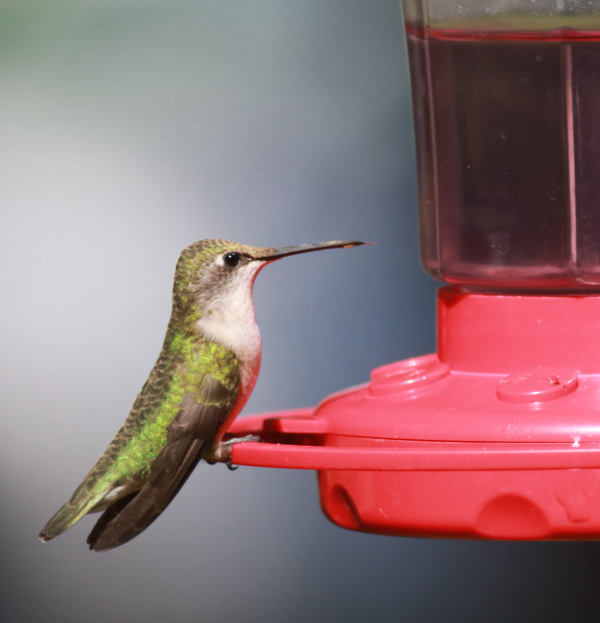
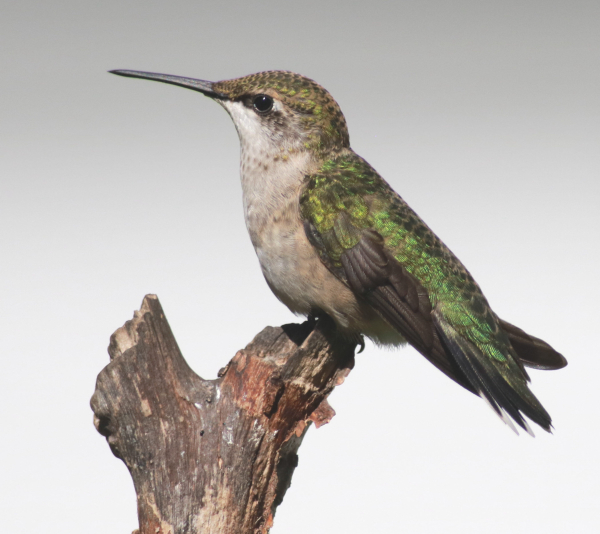
During the past decade, we’ve have a couple different biologist friends who all but replaced their near-professional photo equipment with one of these digital point-and-shoot cameras – Panasonic or Canon models to be exact – and after seeing the quality of the photos, we sometimes use them with good results. We are convinced that if you don’t already have a camera and lens system, using one of these cameras will allow you to get a good start and take some fulfilling photos in some of your first attempts, from an open window or while standing or sitting comfortably near your feeding station.
Additional Considerations
One important consideration is to buy a camera that has a viewfinder eyepiece, through which you can look to observe avian subjects. Looking through the viewfinder eyepiece is the best bet when photographing, especially because you have more control over the camera to hold it steady, rather than viewing through the rear LCD screen, which requires holding the camera with your arms extended in front of you, a very unsteady practice.
We also strongly recommend that you should not use an Automatic setting – no camera can think better than a person, and there are much better options when working with a camera’s settings. Aperture Priority is a preferred setting for any photographer to use, and there are other options.
After you take photos, it’s common practice to review your photos on a computer or iPad screen to check the sharpness of the photos you are taking, review the colors and actions produced photo to photo. Also review the lighting, and check for shadows. Photography is based on always learning, always getting better, getting better photos. Experience helps, but you may get some fine photos your first half-hour of trying. If you do, or if you don’t, keep trying; but you don’t need us to tell you that – you will enjoy photographing birds enough in short order to spend more and more time photographing birds.
Back Issue
Finally, please review last week’s Backyard Birding article (asap), “Photographing at Your Feeding Station,” to review the how-to aspects; and perhaps more important, the when-to aspects of photographing birds. Remember, photography is all about proper lighting, which may also include proper positioning, and picking the right time of day to photograph. So take a second look at last week’s article, filed among your emails, or you can refer back to the Archive files provided on our website at Birding Wire (BirdingWire.com).
Photographing at your feeders and bird bath is easy, and it is really fun. You can simply grab your camera and position yourself near your feeding station or garden bird bath, sit in a comfy chair, and wait for the birds that are sure to appear to get food and water. And when you have some success photographing birds in your yard, it’s always fun to share your best photos with other birders, family, and friends. Most of all, enjoy the process as much as the rewards.
Share your backyard birding experiences and photos at editorstbw2@gmail.com


